Denoising an image in Photoshop is not difficult, but it does require a good understanding of the noise removal toolkit. The entire process, from start to finish, can be completed within a few minutes.
Unfortunately, you can ruin your photo if you reduce the noise in your image incorrectly. With every option for noise reduction Photoshop offers, there are downsides to taking it too far or not applying enough.
In this ultimate guide, we’ll cover all the background information you need to know in order to denoise like a pro. That includes what noise reduction actually does, the different types of noise, and a breakdown of noise reduction tools in Photoshop.
We will even include extra ideas for what you can do to prep your image before you even load it into Photoshop. By using Imagewith.AI, you can make Photoshop’s job easier by sharpening and upscaling the image for edits.
What Are The Different Types of Noise?
Luminance Noise
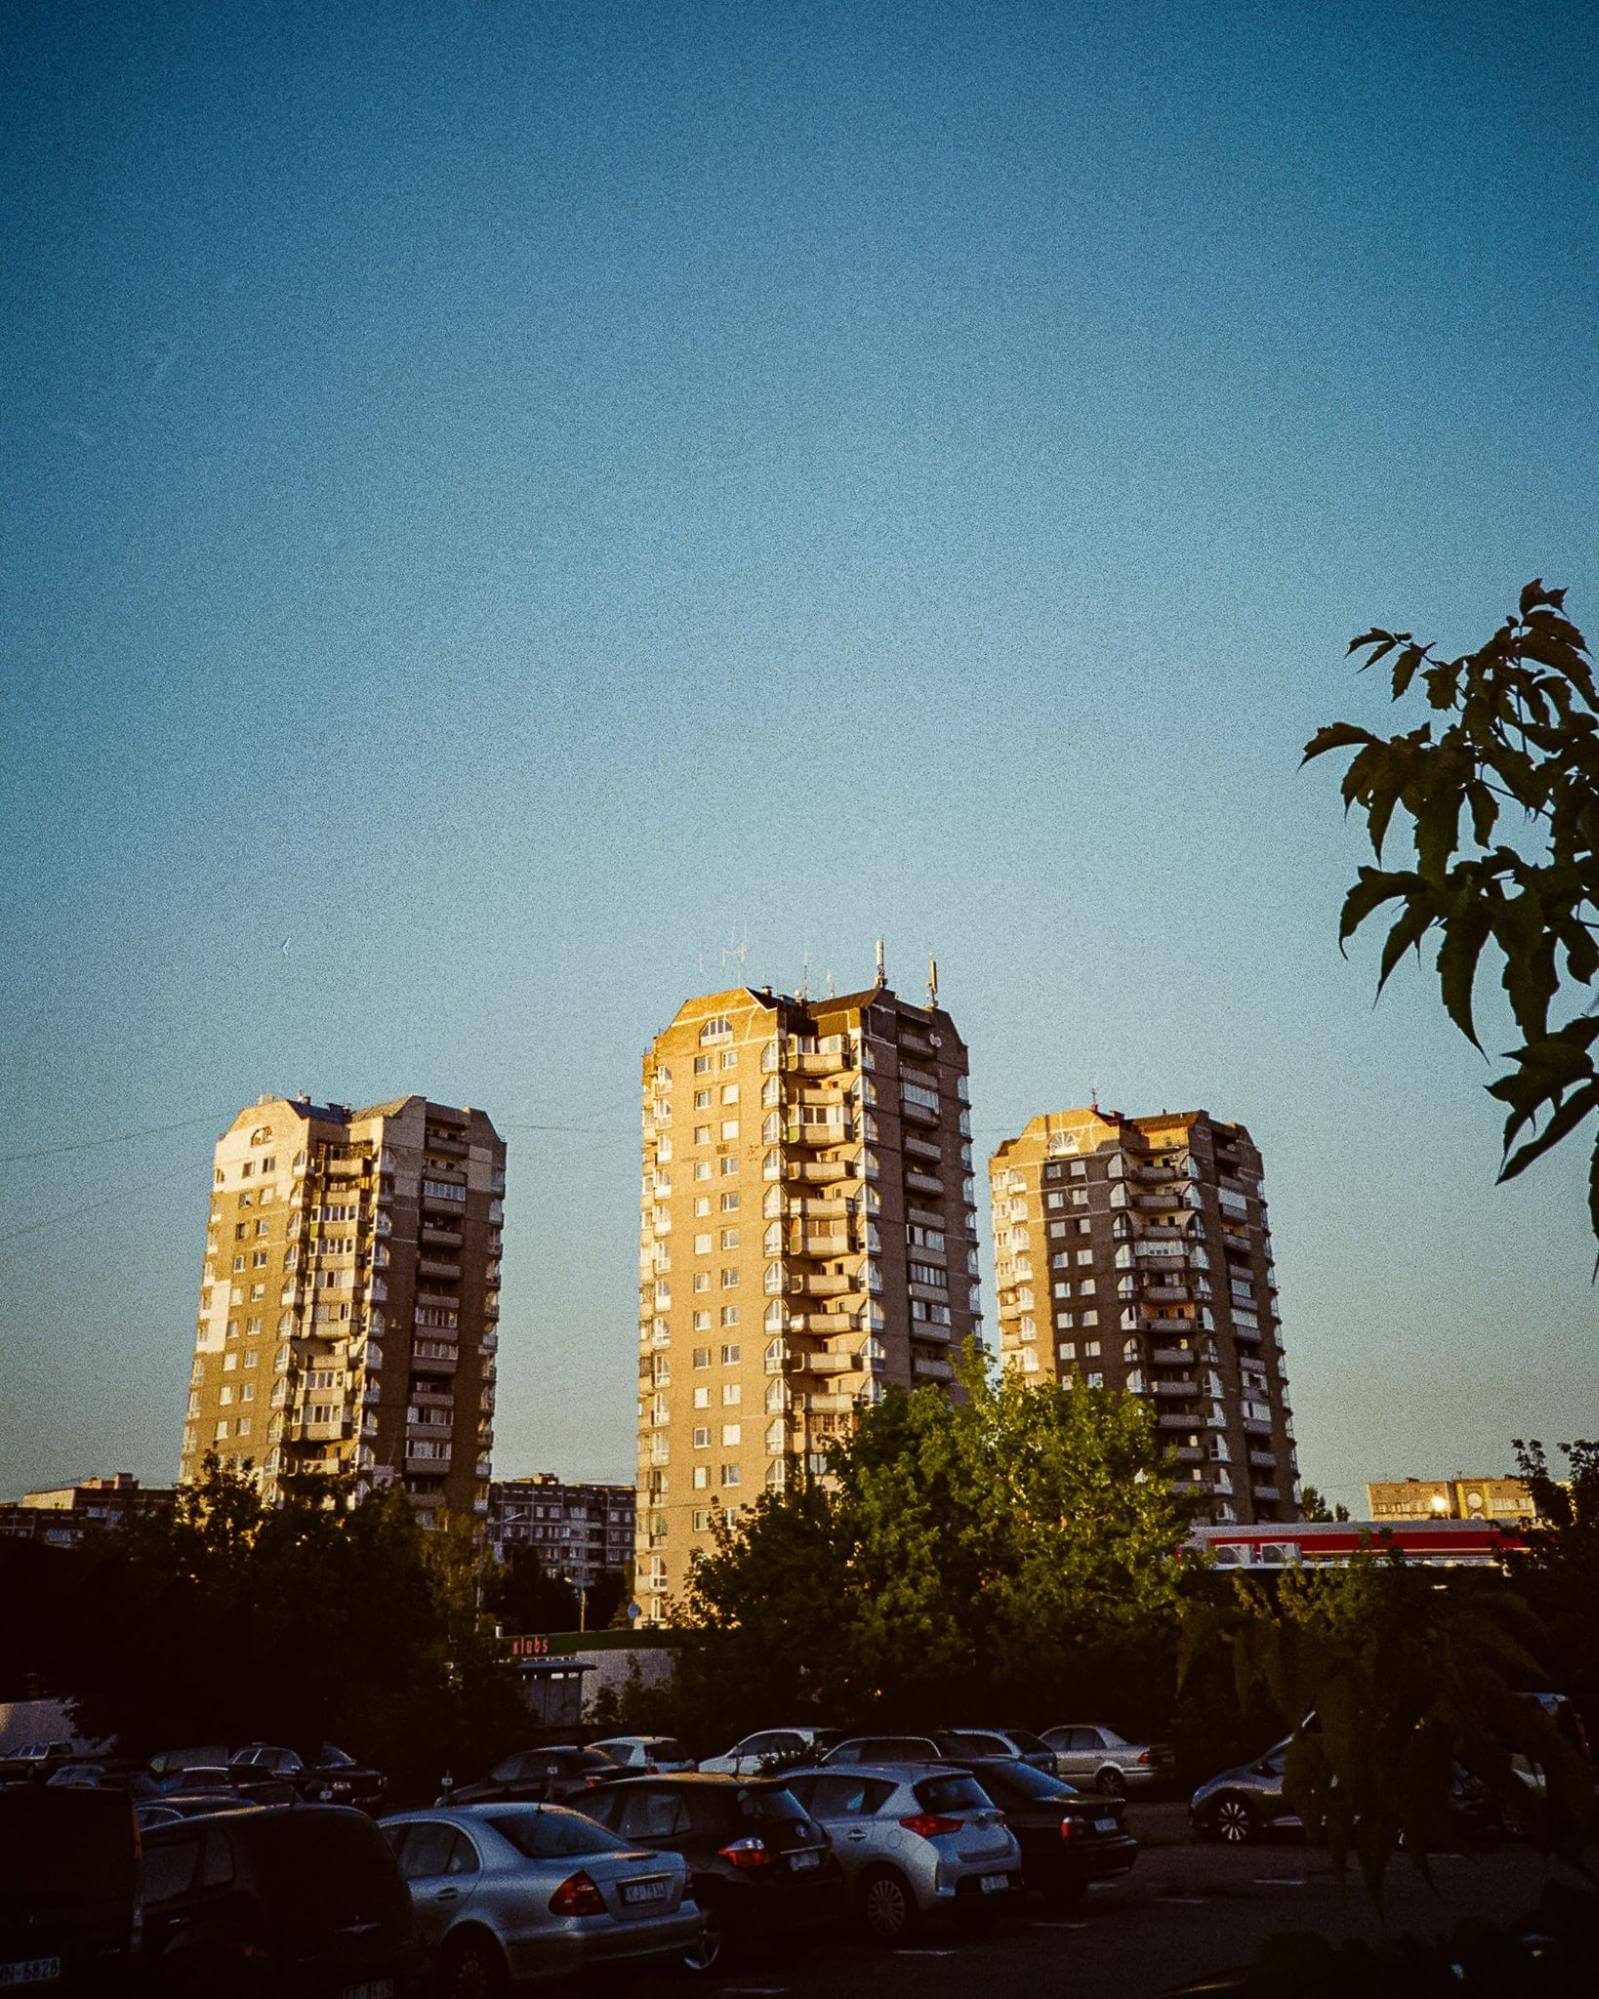
Luminance noise is the most common type of noise, since it comes from a simple exposure problem. You can identify luminance noise by looking for that fuzzy, static-like appearance, especially around main subjects.
Photos taken in low light situations are the most likely to have issues with luminance noise. Even photos taken at dawn or just before sunset might have luminance noise. Actually, you could even have luminance noise in a photo taken in the middle of the day, if it was cloudy or the camera was angled in the shade.

So what actually causes luminance noise to happen?
Simply put, it all depends on the ISO that was used to take the photo. Any ISO beyond 100 is likely to introduce noise into the image. The higher the ISO, the greater the noise.
It's recommended to always keep your ISO at 100 to avoid noise, but that isn't necessarily realistic. Sometimes, you might need to capture a photo in dimly lit situations. Increasing the ISO and creating luminance noise is the only option if you don't want to lose detail in the photo.
In fact, luminance noise is just extra, unwanted detail that the camera is picking up.
Color Noise
Although it sounds similar, color noise (also called chrominance noise) is a completely different concept entirely. Color noise looks like random, bright colors, such as red and green, scattered across your photo.
The colors from color noise will stand out against the normal and natural colors in the photo. They're most likely to show up in the most underexposed areas of the image.
Color noise isn't caused by a high ISO like luminance noise is. Instead, it is caused by the lens heating up. This shouldn't typically happen while taking regular exposure photos unless there is an issue with your camera.
However, while taking long exposure shots, there's a chance that the lens will heat up enough to cause color noise. For example, timelapse or night time shots might use long exposure times that create color noise.
Color noise is not the same thing as chromatic aberration, which is the failure of colors to mesh together. Chromatic aberration has an entirely different cause: the dispersion of light. It might even be the result of imperfections in the lens. Although shooting at a higher f-stop can help combat it, chromatic aberration isn't directly caused by manual camera settings.
Chromatic aberration is not considered a type of noise, and fixing it in Photoshop won't be covered in this guide.
What is Noise Reduction?
Noise reduction is a technique to get rid of unwanted noise. It usually focuses on luminance noise, since it is the most common type of image noise. However, some noise reduction tools (such as the ones offered by Photoshop) include color denoising.
There are two main forms of noise reduction. One of them utilizes a highly-trained AI to do the denoising for you, which Adobe has added to their suite of tools as of 2023. The other is the type we will be covering in this article: manual denoising.
With this type of denoising, Photoshop is still doing most of the legwork for you. The only difference is that you are in control of changing specific sliders to create a well-adjusted image.
The idea behind all varieties of noise reduction is that you need to pull back some of the color or light detail in the image. As you’ve just learned, luminance noise is actually just the presence of too much unnecessarily captured detail.
As a result, applying excessive noise reduction to a photo can come with some serious problems. As you remove detail in order to get rid of noise, you might accidentally strip away important details in the image. Alternatively, the photo might become too blurry and lose its professional edge.
If there is already some blurriness in the photo, or the photo quality is low, we suggest fixing those issues before you run to Photoshop. Those problems will be magnified once you start the noise reduction process.
We suggest using a third-party AI tool, since it’s one of the fastest and simplest methods out there. It only takes seconds to increase photo resolution, giving Photoshop more to work with when the time comes.
- Go to Imagewith.AI’s overscale tool.
- Press Upload Image and find your photo.
- Select the desired amount of resolution upscale. The higher the resolution, the more detail Photoshop will have during noise reduction.
- Press Overscale and wait for the image to process.
- Press Download.
With that out of the way, you and your photo will be set up for success once you move on to the Photoshop noise reduction process.
How to Remove Noise in Photoshop
Step 1: Upload Image
Click New File on the Photoshop home screen, or navigate to File > New if you already have a document open.
To upload your image, go to File > Place or drag and drop a photo from your file explorer into the Photoshop document.
If you are already in an open document with the image you want to apply noise reduction to, skip this step.
Step 2: Duplicate Image Layer
Right click on the layer that contains the image you’re trying to denoise. Press duplicate, and type in a new name for the layer. You will be editing the duplicated layer and not the original photo so that you can easily return to the original if you make a mistake.
Plus, the original image layer will allow you to carefully compare the details between it and the denoised version. Since denoising an image in Photoshop can cause issues such as loss of detail or blurriness, you want to be able to monitor quality throughout the process.
Step 3: Identify Noise Type
In order to tactfully remove noise from a photo, you need to identify the type of noise. Zoom in as much as necessary to see the pixels clearly.
If there are stray pixels of bright color, like red, green, yellow, and blue, then it’s likely that you’re dealing with color noise. If there is a static-like effect with pixels ranging in brightness or darkness, then it is luminance noise.
You might have more than one type of noise in your image. Just make note of what types you see, where the most noise is. You should also locate where the noise interrupts image quality the most. In other words, you want to see where noise is the most noticeable to a casual viewer– even if there is more noise in another section of the image.
Step 4: Open Reduce Noise Dialog Box
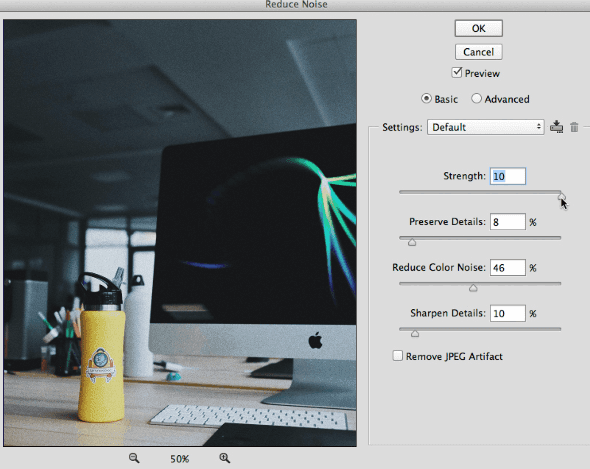
Navigate to Filter > Noise > Reduce Noise in the vertical tool head at the top of your screen. Once you press Reduce Noise, a dialog box will open. There are four sliders that you can use to alter the amount of noise in your photo.
Strength informs Photoshop how strong you want the denoising effect to be. The higher the strength is, the more noise reduction will be applied to your image.
Reduce Color Noise is a setting that only impacts color noise, not luminance noise. As you increase the slider, color noise will be removed from the photo.
The Preserve Details slider controls how much detail from the original image is kept.
Sharpen Details doesn’t impact noise at all, but instead eliminates blurriness and fuzziness in an image. It does this by sharpening the outlines around subjects and key details.

Before moving to the next step, Zoom in to 100% so you can watch the change in detail and noise easier.
Step 5: Change Sliders to Denoise Image
Start by changing the Strength of your image in the dialog box. You can alter it again later, but try to increase it at least somewhat. You need to be able to see how noise reduction will change your image before you can change the other sliders.
Pro Tip: Change your Strength to (10) so you will be able to see the full impact of all the other sliders easier. Once you’re done adjusting, you can go back and reduce strength to the desired level.
Since color noise usually only exists as a handful of colorful pixels scattered across the image, you will rarely need to bring Reduce Color Noise above the halfway point. In fact, you should keep this slider at 0 if you don’t have any color noise at all.
If you set Reduce Color Noise too high, you will lose color detail and blocks of color will blur together.
As you increase the denoising Strength, some important details will be lost alongside the noise. You can’t preserve all the details in your photo or noise reduction will have no impact. However, you want the most important details to remain.
Set the Preserve Details slider to max. Then, slowly drag it down until you are happy with the amount of details in the image again.
You should use the Sharpen Details slider only if there is blurriness in your image, since it has no impact on the noise. However, you should know that the more noise reduction you apply, the blurrier your photo will get.
That means Sharpen Details needs to be tweaked in tandem with Strength so that you can remove noise without creating a blurry image.
Step 6: Double Check Preview
Remember, you can click on the preview image to toggle between the original and the denoised preview. You should double check the preview against the original now, if you haven’t already.
Pay special attention to key details in your image. You need to make sure you haven’t lost too many details from the denoising process.
Plus, make note of how blurriness or sharpness has changed between the two photos. They should ideally have a similar level of sharpness unless the original photo was too blurry. In that case, check to see if you’ve reached a better level of sharpness.
An image that is too sharp will almost look like it has a sharp halo around the main subject. If you see that, then you need to lower the sharpness. If the image is too blurry, you will either need to increase sharpness or reduce strength.
Finally, make sure that there is no lost color detail. If the colors seem to blur into each other or there are odd color blocks throughout the image, you need to lower the color noise reduction slider.
Analyze the image while tweaking Strength and other sliders until you like the result.
Step 7: Accept and Save
Once you’re happy, Press OK to accept Photoshop’s noise reduction changes. You can now continue editing your photo or save it to use later.
Conclusion
Noise reduction doesn’t have to be a complicated process with the right information and toolkit at your disposal. Neither does any other aspect of photo editing– in truth, you can complete a number of simple tasks without even opening Photoshop to begin with.
Take to Imagewith.AI and you’ll have multiple AI-powered image editing tools at your fingertips. No account is necessary, and everything works within seconds.
Sure, you can increase image resolution with the Overscale tool. But did you know that you can also use the Background Remover to prep images fast for social media graphics?
There’s also the Clearoff tool, which you can use to delete unwanted objects quickly and seamlessly


