Having too much grain in your photos can ruin a great shot. High ISO settings often cause extra Noise. Luckily, Photoshop has powerful tools to reduce grain and Noise. In this guide, you'll learn different techniques to remove unwanted grain from your images smoothly.
We'll cover basic ways to reduce grain in Photoshop, like using the Reduce Noise filter. You'll also learn more advanced techniques for subtle, selective grain reduction while maintaining sharp details. With the right approach, you can process high-ISO shots into clean, professional-looking images.
Along with these Photoshop tips, I'll explain how camera settings like ISO affect grain. Understanding the causes helps prevent excessive Noise when taking photos. With both in-camera and post-processing methods, you can get rid of grain while capturing stunning images.
What is Grain?
Traditional photographic film contains silver halide crystals in its emulsion layer. These crystals are light-sensitive, allowing the film to capture an image when exposed. The amount and size of the silver halide crystals directly affect the film's sensitivity to light, as measured by the ISO rating.
How Important Is ISO?
Film with a lower ISO rating, such as ISO 25 or ISO 100, has smaller and fewer silver halide crystals. This makes it optimal for bright lighting conditions. The smaller crystals and less dense emulsion create images with fine grain and high sharpness. However, the low ISO film requires more ample lighting for proper exposure.
On the other hand, high ISO film, such as ISO 800 or ISO 3200, contains larger silver halide crystals in greater concentrations within the emulsion. This makes it highly sensitive to low light levels, ideal for night shots or poorly lit indoor settings. However, the large crystals also increase visible grain and Noise in the resulting photographs.
In summary, the ISO rating directly relates to grain levels in film photography. Lower ISO leads to less grain but requires more light, while higher sensitivity film allows shooting in the dark but has more pronounced grain as a trade-off. Carefully selecting the optimal ISO film for the lighting conditions helps reduce unnecessary grain while achieving the desired exposure.
What Causes Grain in Photos?
Before removing grain, it helps to understand what causes it in the first place. There are several common reasons you may end up with unwanted Noise and grain in your images. Being aware of these causes can help you take steps to prevent excessive grain when taking photos. In this section, we'll look at some of the main factors contributing to grainy images and how you can address them through technique and camera settings. With this foundation of understanding grain, you'll get the best results when using Photoshop to reduce it in post-processing.
High ISO
Using high ISO settings like 1600 or 3200 allows you to shoot in low-light conditions. But it also amplifies Noise and grain. Whenever possible, use the lowest ISO that allows proper exposure.
Long Exposure
Slow shutter speeds or long exposures let you capture images in low light. But over several seconds, sensor heat and Noise get amplified, increasing grain. Use a tripod and the lowest ISO you can.
Underexposure
If an image is highly underexposed, the Camera will boost shadows when processing the RAW file. This reveals and exaggerates grain.
Old Camera Sensor
All camera sensors generate some noise. However, older camera models tend to have more visible grain at high ISOs and long exposures. Upgrade your Camera if grain is an issue.
Flash Photography
The quick power of a flash can reveal grain since it effectively stops motion. Use lower ISO, diffuse the flash, or move it off the Camera to minimize this.
Post-Processing
Aggressive sharpening and noise reduction can cause grain patterns. Apply filters selectively and use subtle settings when editing.
Preventing heavy grain requires adjusting camera settings and technique for the situation. Following best practices when shooting gives you cleaner files to work with.
Types of Noise
Before we dive into reducing Noise in Photoshop, it helps to understand the different types. This way, you can better identify issues in your photos and choose the right techniques to address them.
Luminance Noise
Luminance noise appears as a grainy, gritty texture across the image. It makes photos look less clear and detailed. High ISOs and long exposures cause luminance noise. It is most noticeable in darker tones but can affect the entire image. Reducing luminance noise helps restore smooth, clean textures.
Color Noise
Color noise results in random splashes of color that do not match the content of the photo. It is especially noticeable in shadow areas. The splotches have an unnatural colored, speckled appearance. Tools like noise reduction filters help remove color noise for cleaner-looking shadows and dark regions.
Shot Noise
Shot noise refers to the visible variation in brightness within an image. The random distribution of particles of light causes it. Shot Noise tends to be worse in low-light images. It has an inconsistent look. Manual techniques like cloning may be needed to even out areas with heavy shot noise.
Digital Noise
Digital Noise stems from interference in the electronic components of a camera. It can be caused by sensor heat, signal processing, or low-quality electronics. Digital Noise appears as blemishes and banding, unlike natural image noise. Upgrading camera equipment can help avoid digital noise issues.
How Do You Avoid Taking a Grainy Photograph?
There are a few popular techniques you can use to minimize grain in your photos before editing them.
- Always use the lowest possible ISO setting for your camera and lighting conditions. Keeping the ISO close to 100 will prevent excessive Noise. Of course, for low-light shots, you may need to increase it, but adjust the aperture and shutter speed first to keep the ISO as low as possible.
- Add more light to your scene with flash, reflectors or by finding brighter areas to shoot in. This avoids having to boost the ISO to compensate for dark conditions. Just be mindful not to blow out or overexpose your subjects.
- Intentionally overexpose your image slightly by around one stop. This can help reduce grain appearance when you adjust the exposure in post-processing. But overdoing it can blow out highlights and details.
- Many cameras also have built-in noise reduction settings you can enable. This automatically reduces Noise, but high settings may overly smooth details. Use the lowest setting that gives the reduction you need.
- Shooting in RAW rather than JPEG gives you more flexibility to reduce Noise in your editing software. RAW images have lossless quality for making adjustments.
Following best practices when shooting gives you cleaner files with less visible grain. But when needed, RAW allows precise control over noise reduction.
What Reduces the Sharpness of a Photo
There are a few main things that can make photos look less sharp:
- Missed focus - Especially with shallow depth of field, inaccurate autofocus causes blurry shots.
- Diffraction - Using minimal aperture settings like f/16 can soften images. Keep aperture around f/8-f/11.
- Lens issues - Poor quality, damaged, or dirty lenses reduce sharpness. Use high-quality lenses.
- Low resolution - Fewer megapixels can look soft when images are enlarged. Use a higher-resolution camera.
- Camera shake - Slow shutter speeds without a tripod cause blur from movement. Keep the shutter speed fast enough.
- Motion blur - Fast-moving subjects can blur if the shutter speed isn't fast enough.
Getting sharp focus, optimal aperture, quality gear, stable Camera, and proper shutter speed gives you crisp, detailed shots. However, some softness may be unavoidable under challenging conditions.
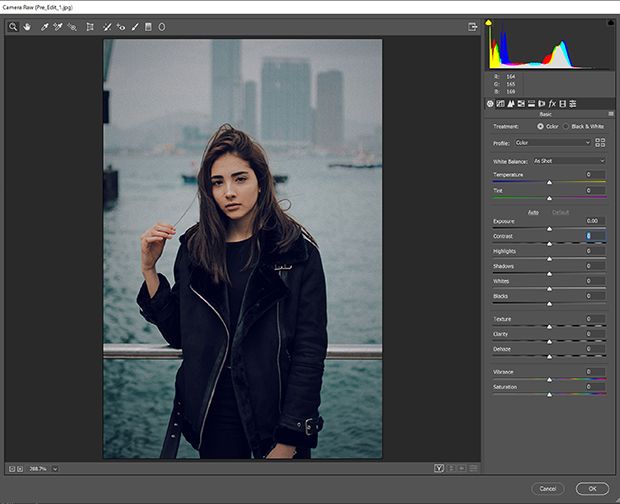
How to Remove Grain in Photographs Using Camera Raw
Using Camera RAW is an easy way to get rid of grain in photos. It works best with RAW files but can help JPEGs too.
To use Camera RAW to reduce grain:
-
Duplicate the layer - Control/Command + J
-
Add a layer mask - Click the layer mask icon
-
Open Camera RAW Filter - Control/Command + Shift + A
-
Adjust sliders like Luminance and Detail to reduce grain
-
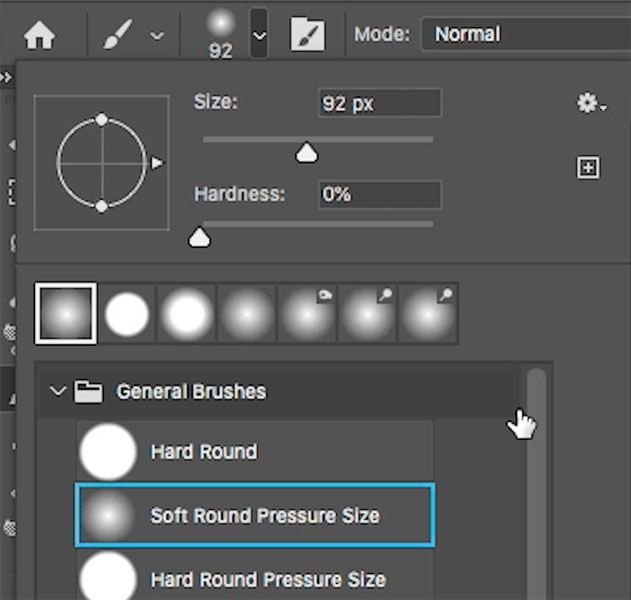
Switch brush to black at 50% opacity
-
Paint on the layer mask to reveal detailed areas underneath


The steps in summary are:
- Duplicate layer for non-destructive editing
- Add a layer mask to undo changes selectively
- Use Camera RAW to reduce overall grain
- Brush black on the mask to bring back essential details
This leaves clean, smoothed areas while restoring sharp details like eyes. The layer mask lets you control where Noise is reduced.
Advantages of Using Camera Raw
You don't need Photoshop to use Camera RAW. Many programs have it built in.
Camera RAW is suitable for fixing grain because:
- It has special filters to reduce Noise.
- Adjusting RAWs doesn't lower image quality.
- You can preview changes before applying them.
- Your original photo stays untouched.
The main sliders in Camera RAW to fix grain are:
- Luminance - reduces brightness noise
- Color - reduces color noise
- Detail - brings back sharpness if needed
- Sharpening - sharpens edges after smoothing
How to Get Rid of Grain in Photoshop: Step-By-Step Guide
Adobe Photoshop is a well-renowned photo editing software. Many users, both professional and amateur photographers, trust its results. You can use the software to remove grain. Follow these guidelines to get it done.
1.Remove Dust and Scratches
Dust and scratches can make your photos look bad. They might come from your Camera or the air. Photoshop has tools to help get rid of them. You can use 3 main tools to remove dust and scratches:
- The Spot Healing Brush. Use this to fix small spots quickly.

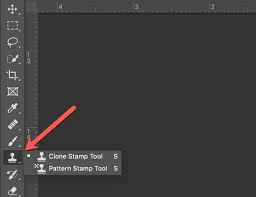
- The Clone Stamp Tool. This lets you copy a clean area of the photo over the scratch.
- Content-Aware Fill. This fills scratches with textures around it.


To remove dust and scratches:
- Zoom in close on the photo.
- Use the Spot Heal tool to fix small spots.
- For bigger scratches, sample a clean area with the Clone Stamp. Brush over the scratch to paint over it.
- For big scratches, use Content Aware to fill it automatically.
Using these 3 tools together, you can clean up dust and scratches in your photos. Your image will look much better.
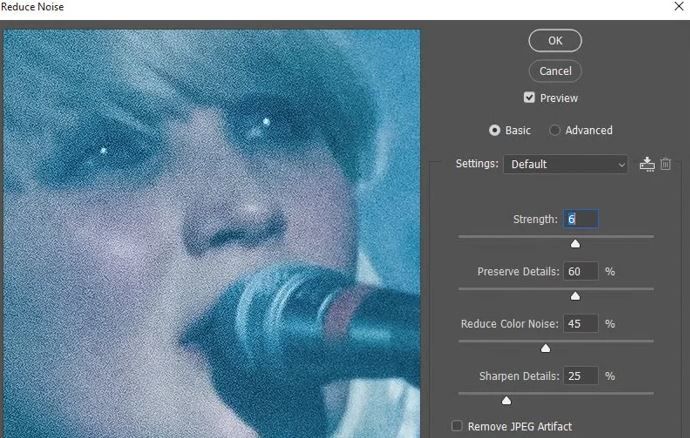
2.Make a Noise Reduction Layer
After fixing the big dust spots and scratches, the next step is to reduce the overall grain.
- First, duplicate the layer - press Control/Command + J or right-click and select Duplicate.
- Now go to Filter> Noise > Reduce Noise. Set Strength higher and Preserve Details on. This will smooth grain but keep some texture.

This works better than Camera Raw for clothes and sweaters. But it loses some background detail, giving a more blurry bokeh effect. To get back some detail, add a Layer Mask to this layer. With a black brush at low opacity, paint over areas gently to reveal some details underneath.
Don't overdo it, or you'll lose the grain reduction. Use a light touch to find the right balance.
So, in summary:
- Duplicate layer
- Apply Reduce Noise filter
- Add Layer Mask
- Brush in black lightly to reveal some details
This produces smooth results while keeping essential textures.
3.Create a Smart Sharpening Layer
To finish reducing grain while sharpening the image:
-
Duplicate the layer again.
-
Right-click the layer mask and select Apply Layer Mask. This will apply the changes permanently to the layer.
-
Go to Filter> Sharpen > Smart Sharpen.
-
Set the amount between 200-250% to sharpen the image.
-
Adjust the other sliders like Radius and Reduce Noise to find the right balance of sharpness without bringing back grain.
-
Make sure Remove is set to Gaussian Blur to reduce blurriness.

This final step of Smart Sharpen will help sharpen up the areas that got blurry while removing grain. It makes the image look crisp and detailed again. Follow these steps, and you'll have a smooth, grain-free image with good sharpness.
4.Create a New Layer Mask
The last thing to do is make final adjustments:
- Add one more new layer mask to the sharpened layer.

- With a black brush, paint over any remaining areas with too much grain. Be selective and paint only where needed.
Reducing grain takes some trial and error. The goal is to smooth out the grain while keeping important details.
Some tips:
- Focus on areas where grain is most noticeable and distracting. You don't need to reduce it everywhere.
- Use low-opacity brushes so changes happen gradually. Build up the effect.
- Zoom in close to minimize grain, but don't lose detail.
- Don't overdo it. Subtle smoothing looks most natural.
The final layer mask lets you brush away any leftover grain selectively. Take your time and evaluate the results in different areas. The final image should have smooth tonality while maintaining crisp detail.
Comparison When Using Photoshop vs Camera Raw to Remove Grain
Here is a simplified comparison of the Photoshop approach vs using Camera Raw:
The Photoshop method takes more steps and effort compared to using Camera Raw. The advantage of Camera Raw is that it's faster and more reliable for reducing grain.
The Luminance slider under the Sharpen tab is an easy way to cut down on grain smoothly. But it can sometimes over-smooth details. The Photoshop approach takes longer but gives you more control. You can selectively reduce grain in certain areas. This helps keep details looking sharp.
So, in summary:
- Camera Raw is faster and automatically reduces grain. But risks over-smoothing.
- Photoshop takes more work but allows selective grain reduction. This maintains crisp detail better.
- There is no right or wrong approach. It depends if speed or control is more important.
- Try both methods on your photos to see which gives you the best grain reduction and detail.
The goal is to balance smooth tonality and preserved detail when removing grain.
Alternative Way of Removing Grain in Images
One effective method for reducing visible grain is to use an AI photo editing tool. In this guide, we'll learn how to get rid of grain using imagewith.AI.
- Start by opening your web browser. Go to the imagewith.AI website and open it.
- Once you have reached the website, you will see several features. Select the Overscale feature, which is responsible for removing grain in images.
- After clicking it, another window opens. Drag and drop the image you want to remove grain from. You can upload the image directly from your device.
- At the bottom of the page, Click “2x” or “4x” based on your payment plan and then click “Overscale” to remove grain from your photo.

- If you are satisfied with the results, click "Download" to save the newly edited picture on your device. You can revert the changes if you don’t like the outcome.


FAQs
How Do I Deal With Color Noise in Photoshop?
To address color noise, use the "Reduce Color Noise" option in the Reduce Noise filter or apply selective color adjustments to target specific color channels.
Can I Completely Eliminate Grain, or Will There Always Be Some Trade-off With Image Quality?
While you can significantly reduce grain, eliminating it may result in some loss of image quality. It's essential to find a balance that suits your specific image and preferences.
What's the Difference Between the Spot Healing Brush and Clone Stamp Tool for Removing Grain?
The Spot Healing Brush automatically samples and blends pixels for quick removal of minor imperfections, while the Clone Stamp Tool allows for more precise, manual correction.
Conclusion
Grain in images can be an inconvenience. However, with the right techniques and tools, you can easily remove it and get a clear picture. This comprehensive guide covers everything you need to know and essential tips that can help improve your image quality. Please go through them and try at your own time. Remember, you might not be perfect at first, but as time goes by, the skills will grow on you.


