Every brand has a story. As a graphic designer, photographer, or digital artist, you capture these stories into striking photos.
You can do this primarily with photography skills. But if you want to enhance your photos, that’s where photo editing skills come in handy.
In this article, you’ll learn the best way to enhance photos using photo editing tools. So that even if you only have amateur photography skills, your photos would still look professional.
Sounds good? Let’s start with the best (and quickest) way to enhance photos.
How To Enhance Photos on iPhone
Nowadays, you’re not required to have a sophisticated camera to capture breathtaking photos. Your smartphone will do with just a few tweaks.
Startups and small businesses could start advertising their product photos enhanced with the iPhone’s intuitive built-in features.
So, how do you enhance photos on iPhone, you ask? Here are four ways:
iPhone Camera Settings for Enhanced Photos
Grab your iPhone, but don’t start taking photos yet.
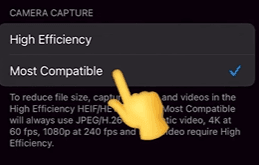
First, go to your iPhone Settings, select Camera, and then tap on Formats. Make sure to turn on the following:
-
Camera Capture: Most Compatible ✅
-
Composition: Grid ✅


Doing this turns on the grid display over your camera screen so you can apply the rule of thirds. Keep the key elements aligned along the gridlines or their intersections. The result? You've got a photo that draws the eye in.
- Smart HDR ✅


Smart HDR ensures your photo isn't left in the dark shadows or glaring highlights. It captures all the nuances, from the subtlest shades to the brightest highlights. The result? Your photos are vibrant, detailed, and have depth to it.
Portrait Mode Light Settings
If you don’t have enough resources yet to shoot portraits in a studio with expensive equipment, you can start with just your iPhone and a subject.
Open your camera and tap on Portrait Mode. You can try the following light settings:
- Natural light - adds that soft, golden touch to your subject, enhancing their features without harsh shadows. Perfect for outdoor settings.
- Studio light - mimics the lighting you'd find in a professional photography studio. Fantastic for headshots or portraits in indoor settings.
- Contour light - creates subtle shadows and highlights along the natural lines of the face, emphasizing the facial features and adding a touch of mystery.
- Stage light - isolates your subject against a deep black background, creating a dramatic spotlight effect.
- High-key light mono - creates beautifully lit, monochromatic portraits against a seamless white background.
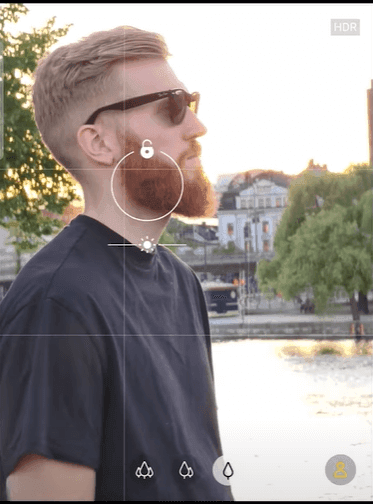
The picture below shows an example of enhancing a photo on an iPhone using the Studio Light setting.


Sundial for Exposure Light
Use the sundial for exposure light to add a natural, warm glow to your photos — especially if you want to achieve visually appealing and contrasting images.
Do this trick with your iPhone camera:
-
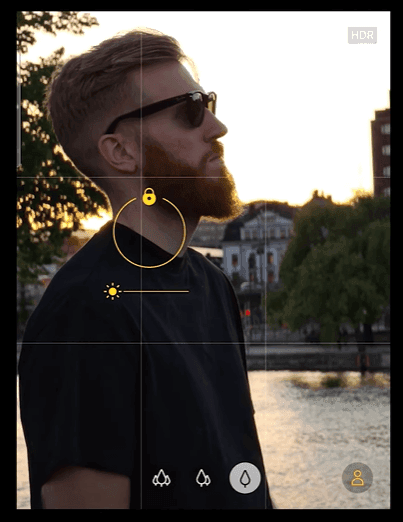
Tap on the area of the screen where the sundial's shadow falls. Doing this tells your iPhone's camera where the main light source should come from.
-
A yellow box and a sun icon will appear. Slide your finger up or down on the screen to adjust the exposure manually. Watch the sundial's shadow while doing this.
-
Tap to focus on your subject or background. Press the shutter button to capture the photo once you're satisfied with the exposure and focus.


Photos App
A built-in editing app that enhances your photos so you won’t be overwhelmed by having to use third-party tools.
The Photos app offers a variety of features, such as:
- cropping and straightening
- adjusting the sliders for exposure, brilliance, highlights, shadows, contrast, brightness, black point, and saturation
- apply filters to add color tones and styles
- lighting and color adjustments
- sharpness and definition
- noise reduction and vignette
Watch the tutorial below to help you enhance your photos with iPhone’s Photos app.
How To Edit Photos On iPhone Using The Built-In Photos App
How To Enhance Photos Using Mobile Apps
If your creativity is limited by the Photos app, you can always use other photo editing apps.
There’s Snapseed and VSCO, to mention a few. But perhaps the most sought-after mobile app by photo editors is Adobe’s Lightroom Mobile app.

It has the same adjusting features to enhance photos and more! Photographers can use their favorite settings as pre-set filters. Apply specific filter styles or themes to enhance photos, creating consistency with your creative brand.
Another fantastic feature is the masking and selection tools for detailed adjustments to specific areas of the photo without affecting the entire image.
How To Enhance Photos on Photoshop
You can do almost any photo enhancement in Photoshop, especially for experienced designers. I’ll leave the Photoshop tips and tricks to you.
Tip: You can start with YouTube tutorials for free knowledge.
For this article, we’ll focus on enhancing photos on Photoshop, specifically in changing low-quality images to high quality.
You know those circumstances when you have a small image, but you want to upscale it without appearing pixelated? Here’s how you’re going to do it:


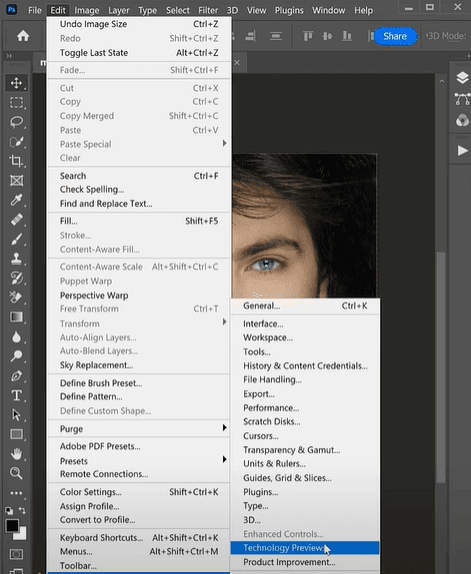
- Click the ‘Edit’ tab located in the header ribbon. Select Preferences, then click on ‘Technology Preview’.
- Tick the box that says: Enable Preserve Details 2.0 Upscale.
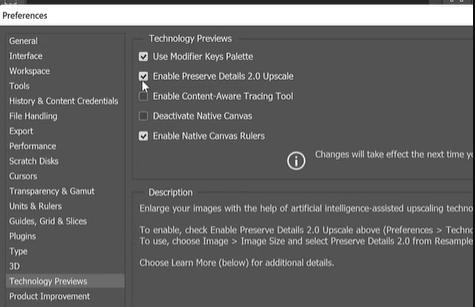


Click OK.
3 . Now, go to the ‘Image’ tab. Choose ‘Image Size’ from the dropdown menu. Set the Resolution value to your requirements.

4 . Click the dropdown arrow beside ‘Resample’. Then choose ‘Preserve Details 2.0’. Adjusting the ‘Reduce Noise’ slider can further customize the sharpness.

Voila! You preserved the image quality even at larger sizes, ensuring crisp and clear prints.
How To Enhance Photos Online for Free
Another way to enhance photos is by using editing tools online. In this article, we’ll use Canva as an example for graphic design tools and AI Image Editoras an example for AI photo enhancers.
Canva
A popular tool made for graphic designers and especially with wanna-be designers who are not proficient with Photoshop.
You can use Canva for free, but they also have premium features like some of the Magic Tools we’ll be showing next.
-
Adjust Tabs
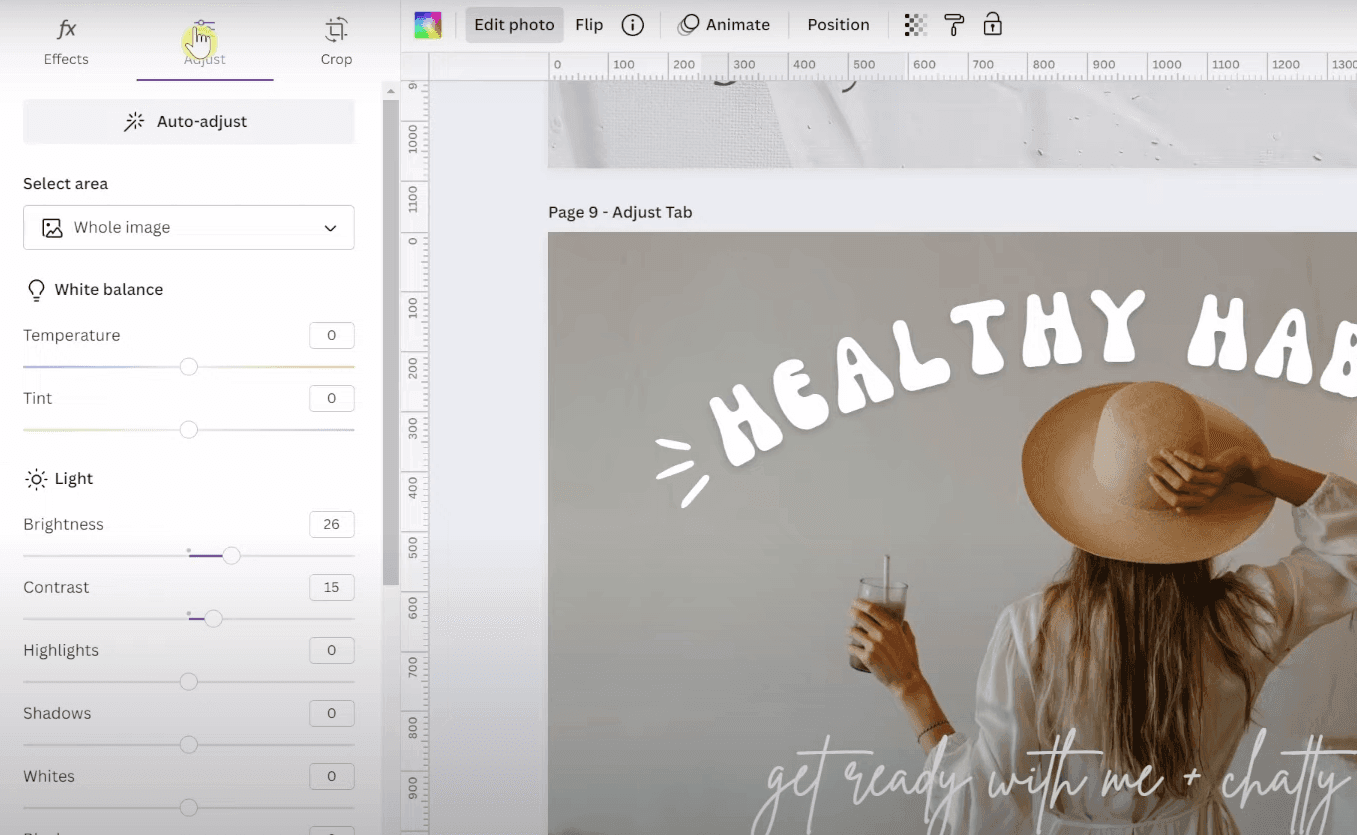
-
Filters


Tip: Adjust the intensity to control the effect's strength.
- Shadows

Shadows add depth and dimension to your photos, making them appear lifted off the canvas.
Click on the ‘Effects’ option in the toolbar and toggle the ‘Shadow’ switch. You can adjust the shadow's color, opacity, distance, and blur to control how you want it to appear.
- Magic Tools (Edit, Erase, BG Remover)
These are Canva’s premium tools that use AI technology to enhance your photos. For example, the Magic Edit feature can replace any part of your image with anything you want to generate.
In the example below, the user brushed over the oranges to replace them with apples instead.

Give it a few minutes, and it’ll generate different options.

AI Image Editor
If you want to finish the job quickly, leave all the fuss to AI. There are several free AI image upscalers and editors online. For this article, we’ll look at the features of Imagewith.AI.
If you don’t have access to Photoshop tools for upscaling photos, you can use the Imagewith.ai Overscale feature of Imagewith.AI instead.
Transform your images into high-resolution ones with detailed, upscaled, and enhanced quality by 2x or 4x (up to 16000×16000 pixels) in just seconds!

How do you enhance photos using AI?
Just upload the image in JPEG, PNG, or TIFF formats. Select the desired enlargement level and then download your upscaled photo.


Use the Clearoff feature to erase unwanted objects, people, defects, or watermarks on your photos.
Select the unwanted object (the watch, for this example) with a swipe, and then it’s gone!
If you want to enhance photos by removing the background, you can do so with just one click with the Outcut feature!


Upload the image, wait a few seconds, and download the PNG image to your computer immediately. What a time saver!
—--------------------------------------------------------------------------------------------------
Those are the different ways to enhance photos. Which is the best way to enhance photos? I’ll let you decide.
The best way to enhance photos depends on your style, goals, and creative vision.
Whether you opt for the simplicity of iPhone's built-in features, the versatility of Canva, the precision of Photoshop, or the speed of AI-driven tools like Imagewith.AI, each method caters to a specific need.
So, embrace these diverse tools, experiment, and let your creativity flourish.


